SmartConfig介绍 随着越来越多智能家居设备进入家庭,这些产品大部分都是要连接家庭的WiFi网络的。而WiFi网络的接入需要知道无线路由器的名称(SSID)和密码,绝大多数的智能家居是没有输入接口的,在设备中预先设置WiFi的名称和密码显然是不现实的,这样对于智能家居要连接的无线路由器输入无线路由器的名字和密码就成了一个困难。为了克服这个问题,人们使用了多种配网方法,比如智能家居热点配网,手机热点配网,蓝牙辅助配网等等,这些配网方式都存在一定的不方便之处,而smartConfig配网方式是这些无线配网方式里面比较方便和快捷的配网方式之一。
设备进入初始化状态,开始监听附近的WiFi数据包。
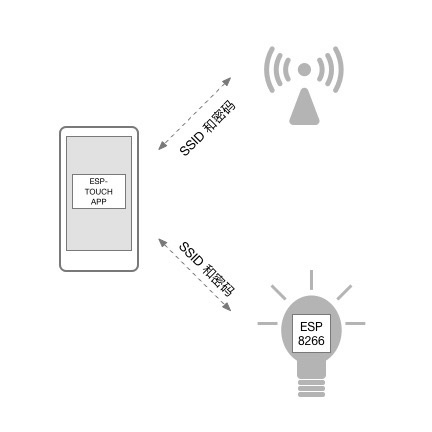
手机/平板设置WiFi名称和密码后,发送UDP广播包。
设备通过UDP包(长度)获取配置信息,切换网络模式,连接上家里WiFi,配置完成。
SmartConfig智能配网代码说明
引入头文件
SmartConfig智能配网
SmartConfig智能配网用到的主要函数为WiFi.beginSmartConfig()。通过查询SmartConfig连接状态判断WiFi是否连接成功,用到的主要函数为WiFi.smartConfigDone()。
1
2
3
4
5
6
7
8
9
10
11
12
13
14
15
16
17
18
19
20
21
22
23
24
25
26
27
void smart_config (void ) WiFi.mode (WIFI_AP_STA); WiFi.beginSmartConfig (); Serial.println ("Waiting for SmartConfig." ); while (!WiFi.smartConfigDone ()) { delay (500 ); Serial.print ("." ); } Serial.println ("" ); Serial.println ("SmartConfig received." ); Serial.println ("Waiting for WiFi" ); while (WiFi.status () != WL_CONNECTED) { delay (500 ); Serial.print ("." ); } WiFi.setAutoConnect (true ); }
开机自动连接WiFi
1
2
3
4
5
6
7
8
9
10
11
12
13
14
15
16
17
18
19
bool connect_wifi (void ) WiFi.mode (WIFI_STA); WiFi.begin (); Serial.println ("Connection WIFI" ); int retry_count = 0 ; while (retry_count < MAX_RETRY) { delay (500 ); Serial.print ("." ); retry_count++; if (WiFi.status () == WL_CONNECTED) { return true ; } } return false ; }
开机判断联网方式,初次联网,则进入SmartConfig智能配网
1
2
3
4
5
6
7
void setup_wifi (void ) if (!connect_wifi ()) { smart_config (); } }
程序运行结果
1
2
3
4
5
6
7
8
9
10
Connection WIFI ..........Waiting for SmartConfig. ............................................... SmartConfig received. Waiting for WiFi WiFi connected: Ohyes IP address: 192.168 .3 .94 hello world! hello world!
1
2
3
4
5
6
7
8
9
10
Connection WIFI ......... WiFi connected: Ohyes IP address: 192.168 .3 .94 hello world! hello world! hello world! hello world! hello world! hello world!
附录:完整代码 完整代码可在GitHub下载:canhetingsky/ESP32_DEV/ESP32_SmartConfig
1 2 3 4 5 6 7 8 9 10 11 12 13 14 15 16 17 18 19 20 21 22 23 24 25 26 27 28 29 30 31 32 33 34 35 36 37 38 39 40 41 42 43 44 45 46 47 48 49 50 51 52 53 54 55 56 57 58 59 60 61 62 63 64 65 66 67 68 69 70 71 72 73 74 75 76 77 78 79 80 #include <WiFi.h> #define MAX_RETRY 10 void smart_config (void ) WiFi.mode (WIFI_AP_STA); WiFi.beginSmartConfig (); Serial.println ("Waiting for SmartConfig." ); while (!WiFi.smartConfigDone ()) { delay (500 ); Serial.print ("." ); } Serial.println ("" ); Serial.println ("SmartConfig received." ); Serial.println ("Waiting for WiFi" ); while (WiFi.status () != WL_CONNECTED) { delay (500 ); Serial.print ("." ); } WiFi.setAutoConnect (true ); } bool connect_wifi (void ) WiFi.mode (WIFI_STA); WiFi.begin (); Serial.println ("Connection WIFI" ); int retry_count = 0 ; while (retry_count < MAX_RETRY) { delay (500 ); Serial.print ("." ); retry_count++; if (WiFi.status () == WL_CONNECTED) { return true ; } } return false ; } void setup_wifi (void ) if (!connect_wifi ()) { smart_config (); } Serial.println ("" ); Serial.print ("WiFi connected: " ); Serial.println (WiFi.SSID ()); Serial.print ("IP address: " ); Serial.println (WiFi.localIP ()); } void setup () Serial.begin (115200 ); setup_wifi (); } void loop () Serial.println ("hello world!" ); delay (1000 ); }
 wechat
 alipay